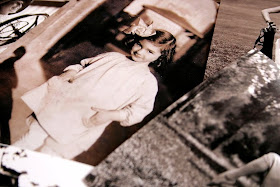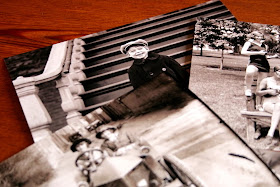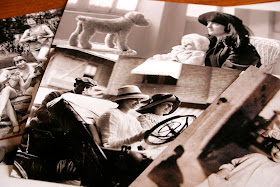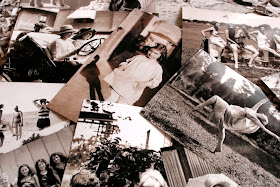
Deborah of The Fairfield House recently hosted a postcard exchange and it really got me thinking about those wonderful old postcards of long ago. I have not yet sent my postcards out because I really wanted to try to do something a little different - something with a touch of old-time charm.
For this project, I decided that I would make my own postcards. The particular postcard project I'm sharing with you today will actually require mailing the postcard in an envelope, but you can modify your card to meet postal regulations and send it without an envelope. Why an envelope for this project? Well, for one thing, you'll be using actual photographs that could easily get damaged in transit.
I quickly see this becoming another hobby!
Second, this project involves adding photo corners to the back of the card to adorn the photo. The USPS doesn't like sticky attachments to postcards because they could come off in their machinery while being processed. Also, the photo corners may add to the maximum thickness allowed for postcards. Lastly, the USPS doesn't like graphics added right under the mailing address on postcards because this is the area that is scanned and barcoded. {Hmm, I just thought of another reason to use an envelope...who wants that ugly barcode across the bottom of their custom made postcard?}The idea is to recreate a lovely, old-fashioned photo gift for your recipient.
The idea is to recreate a lovely, old-fashioned photo gift for your recipient, so basically, the postcard aspect is just a little something to add to the appeal, but as I mentioned, I'll give you some options below if you would like to send the postcard without the envelope.For this project, you'll need copies of some old photographs {you don't want to send the original, of course!}. The Library of Congress has many old public domain photos available.


The hardest part will be deciding which photos to use for your postcards!

You will need some cardstock paper on which to print the postcard. It needs to about the thickness of an index card.

I chose some paper with a nice texture.

You'll also need some pretty photo corners {these were from the Martha Stewart line},

a reprint of an old photo,

some double sided photo tape,

and a paper cutter {or scissors if you have a steady hand!}.

If you will not be putting your postcard in an envelope, you'll need to protect your photo by covering it first with with laminate before attaching it to your cardstock. I won't get into that step here, but it's pretty simple to do. Remember, you will not be using the photo corners if you are mailing as an actual postcard without an envelope.

I created a few postcard documents for you to download using some beautiful graphics I found at The Graphics Fairy here and here. I can't get enough of The Graphics Fairy, by the way!


Click and download the image below to create a postcard that you will be mailing in an envelope. Be sure to print it on your chosen cardstock. {If you just need to mail it without an envelope, I'm not sure how the USPS will feel about the graphic in their "postcard scan/barcode zone"...they'll either send it back to you or they may just require extra postage to send it as regular mail. I don't know...maybe they won't do anything at all but mail it as a poscard! But I do know you'll need more than 1 cent to mail it!}

If you will be mailing the postcard without an envelope, click and download either of the documents below.


After printing your postcards, trim them down to size. For some of mine, I cut right at the red line. For others, I left a small border. It took some practice and I messed up a times, but finally, I got the hang of creating borders.


All of my old photos were 4 X 6 {about the size of the postcard itself}, so I trimmed down my selected photos just a bit to also create a border of sorts around the photo. After trimming your photo, put your photo corners in place...


...and then flip your photo over. Raise the back of the photo corners up a bit and place a piece of photo tape under them.

Then remove the paper backing from the tape and press down the photo corners.

I probably really overdid the next step, but place pieces of photo tape around the perimeter of the back of the photo and remove the tape backing.

Now take your photo and carefully center and place it on the unprinted side of your postcard.

You can also use those photo corners to embellish the corners of the postcard itself. Pretty!

Now all that's left to be done is to fill out your sweet, old-fashioned postcard! Though I'll be inserting my cards in envelopes, I'll still include a mailing address...just because!


When my "work" computer with my editing software is all set up again, I'd love to create some more postcard styles based on inspiration found from actual old postcards. And how fitting would an old beautiful stamp, or a print of an old stamp, be in the corner of envelope mailed postcards? I quickly see this becoming another hobby!

Good idea and helpful tutorial. I did a similiar project with Christmas cards one year and it made my recipients so happy which, of course, is always your goal! Always enjoy your blog. :)
ReplyDeleteVery sweet! I love this idea! I wonder if I can find some old military shots to send to hubby overseas...?
ReplyDeleteI LOVE old photos!!! The ballerina is adorable!
ReplyDeleteThose are beautiful!
ReplyDeleteKim,
ReplyDeleteThank you for the tutorial. How special are these! I can hardly wait to receive my postcard from you. I know it is one I'll be framing and place on my mantel!
The postcard exchange is still going on and I invite your readers to participate.
Your Friend,
Deborah
Love the idea and thanks for the downloads. I've saved them away for another day of playing.
ReplyDeleteI love this idea! I can't wait to try it. Thank you for sharing.
ReplyDeleteWhat a fun project! I have several old photos I'd love to try this with :)!!
ReplyDeletehow cute are these.. I hope to see one soon here.
ReplyDeleteI was thinking about tea dying the paper for business cards.. hmmm...
with love and thanks for more ideas!
Olivia
Okay, i have been searching for postcards and can't find any. I was just about to give up and just send cards now I am going to try to make some. I don't know why I never thought of that, I think I will try something off of graphics fairy. Would you like to switch also? If so email me at jjones523@gmail.com
ReplyDeletevery cool, thanks for giving directions. Lezlee
ReplyDeleteNow I'm super excited to get my postcard!! :) I love this idea and can't wait to try it! I had never thought of actually making a postcard, didn't know you could....thanks for broadening my horizons! LOL
ReplyDeleteHave a great day!
Have fun with your postcards, girls! I can't wait to make more myself! Those that I'm trading cards with, I'll get them out shortly after my trip! Thank you for your patience!
ReplyDeleteWow! Those are incredible! I don't know if I'd have the patience to do it . . . maybe my husband could - he's the artist! (He's gonna kill me . . . )
ReplyDeleteWhat a great idea! I have saved the download and added this to my project list. I love your blog and all the inspired projects you bring us. Thanks
ReplyDeleteVery nice!
ReplyDeleteDo you purchase those prints from the Library of Congress? I love your taste and was hoping to find those same prints. thanks!
ReplyDeletejeanette
from www.sweetjeanette.com
Nice blog. Thanks for sharing that look awesome.
ReplyDeletePrint Postcards
As like your site is informative I think you must post the articles regularly so that we can get many benefits of learning through your efforts. eddm postcard printing
ReplyDelete