Showing posts with label studio. Show all posts

"How Do You Like Me Now?"


I have succumbed to my "what if" tendencies and painted {just one coat so far} our kitchen door that leads into my studio yet again. By now you know that this is my modus operandi. When I'm struggling with a decision - and especially when faced with two choices that are both my favorites,I choose one, but after a while I get curious about the other. How would it look? Would it have been better?

Remember, I had gone with a beautiful shade of blue called "Tranquility" {Valspar shade from Lowes}. I LOVE the color and plan on using it in accents and furniture pieces. But I decided that since I want to use it in accents and furniture pieces throughout the house, maybe having it on all the doors in our house is a bit overkill. Plus, as I've mentioned, this shade of blue seems to be too "pastel" for hubs.


So I painted the door a deep expresso brown - almost a black. {Edited to add that the paint color is called "Fired Earth" from Valspar at Lowes}. Like I said, this is just the first coat and it needs another, but I'm posting a couple of photos because I like the "old, worn" look of it already and plan to scruff it up after the second coat to make it look similar to this.


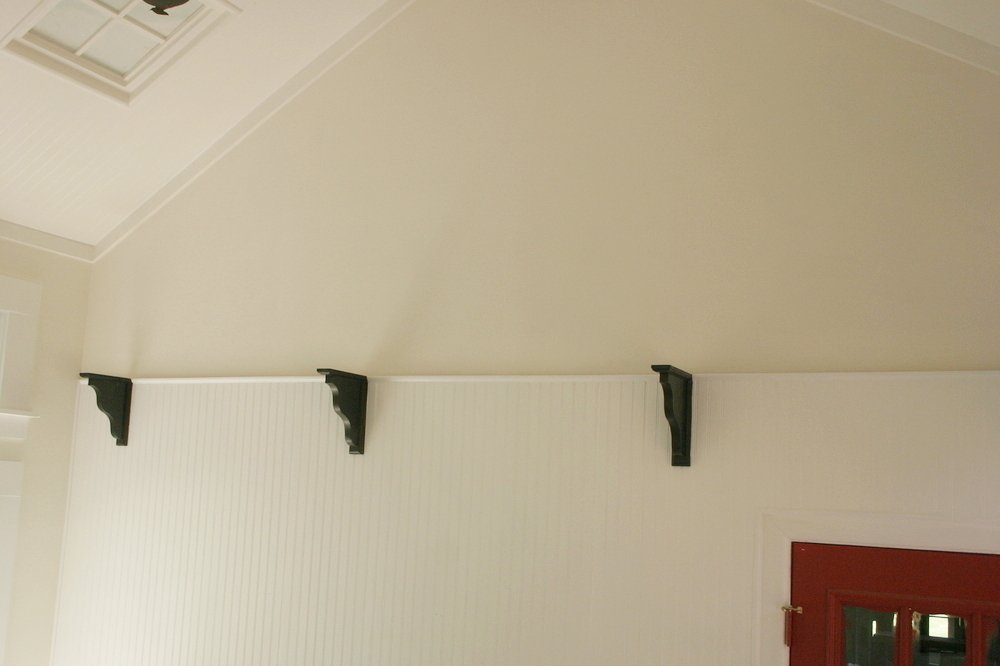
Another change: I repainted my kitchen a few weeks ago but decided not to use the color we painted the studio. What did I go with? Anthem White. The same color as our trim work. Can you tell the difference in the wall colors between the above and bottom photos? I just love the contrast now between the walls and the dark doors and red cabinets...so crisp and light feeling! It's hard to tell in the photo below because of the sun streaming in, but that little chair is painted "Tranquility" like the door use to be. Who knew dark brown, red, and blue could actually work together in peace, love, and harmony?!

Two major remodeling decisions have been made - and I'm sticking to them this time...I promise! 1)Twice Remembered's walls will be white and 2)The doors will be dark expresso brown.

For what it's worth, hubs did not want white walls. He LOVES the dark doors now, though. And he hasn't even noticed I repainted the kitchen. ;)

{Edit: I've opened up my Twitter account again...I'm thinking having just the one account will be easier to keep up with than Facebook and Twitter. You can follow me there for updates between blog posts. Thanks!}

{Participating in Metamorphosis Monday!}

44 comments


The Blue Door


I think perhaps I should have have titled this entry "Ebb and Flo". As most of you know, things constantly change in our lives and we never really know where we are headed next. What I do know right now is that at Twice Remembered, we are feeling a major budget squeeze and have had to take a break from our remodeling efforts. This makes me sad, but I also know that we'll pick it up again as things ease up a bit and when my health hopefully takes an upswing. Hubs has been doing so much domestic work around here when he comes home from work - things that I may not be able to do right now - it's little wonder that he has limited time for even what we can afford to do - like painting! An arm brace is helping me with carpal tunnel issues, and I'm still looking for ways to improve the other health issues...I don't want to be an old lady at 36! Thank you all for your continued visits despite my irregular posts. It's so nice to know that when I'm here, so are you!

I wanted to at least get the one wall shown in the photo below painted the new kitchen color before sharing the new door color with you,
but I couldn't wait! The new door color is called "Tranquility" and I got it from Lowes. I'm loving it! What do you think?


Now I need to find a few more blue dishes like the little creamer in this photo. It matches the door exactly and I'm not sure how that happened!


{Edited to add: My backsplash is a different shade of white than the beadboard...I'll be changing that in the future!}

When I can, I'm trying to keep myself busy at something creative, so work continues on my dollhouse. You will definitely be able to tell that my favorite colors are being used in the dollhouse as well.


You may recognize the little miniature island in the photo above. I'm not quite finished with it yet, but it's modeled after my own kitchen island. It even has a tin ceiling front!


I hope everyone is doing well and staying cool in this heat...it has been a hot summer so far! Until next time...!

33 comments


Interior Doors: Red or Brown? {Or Blue?}


Ah. More color decisions. I know I've asked before, but I'm getting down to the wire deciding on a paint color for our interior doors throughout our cottage. The door leading into studio {above, old photo taken before beadboard was added} is on sawhorses already, primed with a basecoat of white! Whatever color I decide I will distress slightly so some of the white will peek through.


I know that I don't want the doors painted white. However, the trim around them will be white just like the beadboard.

The options that I'm considering are:

A} Red, just like cabinets

OR

B} Dark, dark, chocolate brown

I would like to have a third option {C} which would be some kind of greenish blue color{with a brown glaze applied and wiped off to tone down the color}. It would be similar to the color my studio was once painted or something even richer and darker. This would be really different and unexpected but I'm not sure about it. Hubs already says he's not at all crazy about it. I don't know...but I'll throw that out there for some opinions as well.

The doors inside the studio will be red. No question. They just have to be.:) It's the rest of the doors that I'm up in the air about. As usual!


Edited to add a couple of examples of darker blue/green shades that could work. I guess it's apparent by now that I'm not afraid of color for the doors!


What say you? Ideas? Your suggestions are most appreciated! Thank you!

30 comments


New Paint Color for the Studio - Like an Ice Cream Sundae


I finally decided on a color for the walls of the Twice Remembered Cottage. It was hard. I drove myself crazy with it, even after receiving tons of helpful suggestions and advice from you all. White walls versus off-white walls. It was {seemingly} as simple as that.

I really wanted all white. White walls, white beadboard, white trim. Every shade of off-white that I sampled, and there were many, were just...off...and left me longing for white yet again. I guess maybe that's because we've lived with some form of beige since we moved here. Here is a photo of the color of the walls of the studio when we first moved in.


At one point, though, I wanted something completely different. So I tried a shade of robin's egg blue-ish color. I did love that color, but I also loved the lighter "feel" of the kitchen wall color and decided I wanted to recreate that in the studio.


So we painted again. We used the same color we used in the kitchen. Hubs was not happy about repainting.


Soon I found myself craving all white. The studio gets tons of sun, so I envisioned a bright heavenly white space to call my own...Going to "work" each day would be like stepping out onto clouds on a sunny day!

{A} Hubs did not want to repaint...again.

and

{B} He was not into all white at all. He didn't want all the beadboard and trimwork hidden, he said.

Hubs did not want to repaint...again.
After getting over the first hurdle - convincing him to spend money on paint one more time, I needed to come up with a shade that satisfied us both. Enter a million samples of off-white that were all wrong, wrong, wrong.

Finally, on the brilliant suggestion of one dear reader, I took the beige-y paint that was on the studio walls {the same color that is in the kitchen and living room} and mixed it with about 95% pure white - the color of our beadboard and trim. The result was just lovely! In the studio during the day, where there is so much light, the walls look like light creamy, vanilla icecream. In the evening, the studio looks like the very first photo I posted there at the top - kind of like bisque. This is also what the color samples I painted throughout the house look like - more bisque than vanilla.


I think it's just perfect and correlates well with my passion for faux dessert creations {below}. The color theme for our cottage is like an ice cream sundae... vanilla ice cream with chocolate syrup - some white whipped cream and a red cherry on top!


I still want to somehow incorporate some beautiful robin's egg blue, though, like what is seen in these candy boxes I made quite a while ago.


So what do you think about the new wall color choice for Twice Remembered? Some of you were worried that "all white" would make the place seem too stark or cold, but do you think this shade still retains enough warmth? For those of you who voted for all white, do you think it looks fresh and crisp and clean? I'm hoping that the new custom color captures the best of both white and off-white...but if it doesn't, hubs says I'm not painting again for years!

25 comments


A Studio Project and A Sabbatical


I want to drop everyone a little note to let you know that I've decided to take a little blogging sabbatical for a while. Sometimes life just unfolds in ways that make it necessary to do so from time to time, plus I never know when my health will allow me to "paint the town red" or force me to stay in bed for a day or more at a time {*nothing* serious - just chronic pain issues I've had for several years}. So this is just a little time off to put things back together after a 'bout' and to work on other things as well. Projects will continue here at Twice Remembered, and I will continue to document/photograph them as I always have and share them upon my return. I will definitely be posting on May 29th to announce the winner of my Cottage Charm Giveaway...and I can't wait to see who wins!

My main area of concentration as far as the house goes is getting my studio completed as soon as possible. I am just really looking forward to having a place to squirrel myself away and create - and goodness knows that has been a long time coming!

One studio project that I recently wrapped up was converting this $5 antique headboard...


...into my very own Inspiration Board. I had hubs cut off the legs and then simply painted the frame, painted the old fabric a deep chocolate brown{the fabric had a short nap, or practically no nap - like canvas}, and added natural colored elastic to form the criss-crosses. The bottom rectangles were filled with sheet metal to hold magnets. I think she is so pretty and fits right in with my faux dessert creations {top photo} and the dessert themed studio I've had in mind.


Today I'll be easing my way back into the land of the upright by making real marshmallow fondant for some "Mouse and the Motorcycle" cupcakes I'm going to try to make for my daughter's 2nd grade classmates. This year I read a couple of Ralph books to them in class, so I thought this would be a great way to end the year. I've never worked with marshmallow fondant and the last themed cupcakes I made {"Mexican Food" themed cupcakes}, I only used Starburst and other candy pieces. I have used store bought fondant for figures for the penguin cake I made, but wow, store bought fondant tastes terrible to say the least!

So I'll "see" you again for sure when I post my giveaway winner on the 29th, and I will also be posting photos on the 29th of the wall color I decided to go with for our cottage. Thank you all for your advice on the matter. Let's just say that at one point, I agreed with each and every one of you {I kept changing my mind, going so far as buying paint and taking it back before putting it on the walls.} But I *love* the choice I finally made and I hope you will, too!

Thanks so much for visiting and I'll "see you" again soon!


The 4th Annual Cottage Charm Giveaway list is growing and growing! Thank you to everyone who has contributed a giveaway so far and making year four a great success! Make sure you click on the banner below for more information! There is still plenty of time left to add your giveaway to the list and to sign up to win some really great cottage style gifts!


My Pleating Heart : A Dropcloth Slipcover


Pleats. I love them. I've kept a few photos of the home of Lauren Ross {via Country Living} on file as inspiration for I don't know how long. I mean, how sweet are these?!


Though I hated home economics in high school due largely in part to the half year we spent on sewing and the "C" I was given on my sewing project {a khaki colored jumpsuit that more closely resembled some kind of prison garb, only not made nearly as well}, I know that for me to have any kind of pleated goodness in our home, I'm going to have to create them myself.

One studio project that I needed to tackle was figuring out how to pretty up this Goodwill chair. Yeah. I know. There are three other chairs like it and back a year or so ago, before I was brave enough to pull out my sewing machine, I painted the upholstery on one of them. It turned out great, but I decided I wanted a much softer look for my studio. This chair needed a skirt with pleats o'plenty.


I haven't sewn much since home economics, and it has been years since my last project. But I pulled out my dusty sewing machine

I got off to just a bit of a rocky start when the foot pedal started sparking and smoking...
this past week, oiled it properly, plugged it in, and went to work. I got off to just a bit of a rocky start when the foot pedal started sparking and smoking {which is surely never a good a thing, and it almost made me want to give up before I barely began}. I was able to disassemble the pedal, though, find the loose connection, and after hubs gave it a good going over when he returned from work, I was good to go. I started cutting out pieces on Friday night and by Saturday evening, I was finished. Seems there was much more folding, pinning, and ironing involved with this project than actual sewing!

Just to make it clear {and to explain any visible mistakes!}, I have never done anything like this before. My sewing experience has been limited to throw pillows and a couple of little girls' dresses, one of which was never completed because the zipper part befuddled me. So, you see, this was a huge undertaking for me.


Other than the inspiration photos above, I didn't have any other information to go by because all the "how to's" that I tried to read just confused me greatly. Memories of home economics flooded back, so I just winged it and did my own thing - which is what, I'm sure, got me that "C" in the first place!


My pleated slipcover is far from perfect, but considering what the chair looked like before, I think it's a great improvement!


{For those of you who are wondering about the fabric, it's just a new dropcloth that has been washed in warm water and dried to make it nice and soft.}


The first week of the 4th Annual Cottage Charm Giveaway event has gotten off to a great start with over 30 giveaways added already! Thank you to everyone who has contributed a giveaway so far and making year four a great success! Make sure you click on the banner below for more information! There are about 3 weeks left to add your giveaway to the list and to sign up to win some really great cottage style gifts!


Goodbye 2009, Hello DIY Magnetic Scrabble Board Project!


Hello, my dear blog readers! How are you? It has been a couple of weeks since I've posted, I know. Shortly after my last post, hubs and I were both hit with a really nasty bug/virus of some sort - two of our children had already been dealing with it and our third got it right about the same time we did. The kids are now mostly better, but hubs and I have pretty much been bed ridden for two weeks. I've had to get out to do some grocery shopping and to take some of my brood to the doctor, but other than that, we've been horizontal, ugh! We had a lot of Tomorrow is another day - and another month, year, and decade! plans for our winter break, but none of them worked out. But tomorrow is another day - and another month, year, and decade!

I guess it goes without saying that my little studio is not complete - I did not reach my goal of having it completed by the end of the year. Prior to us being sick, hubs wanted to spend two or three weekends laying more hardwood flooring, so that was work time that took away from my studio ...but I don't mind. I'm thrilled to finally have some more real flooring! I've decided that my goal for 2010 is to not stress about reaching my self imposed deadlines. This year - {this decade!} has shown me that life happens - things beyond my control, and that I need to just try to roll with it. I want to continue to enjoy our projects as we get to them and complete them, but I don't want to take the fun out of it all by being discouraged over missing deadlines or worrying over "what I'm going to blog about?!". It's all good, for there is nowhere to go but forward!

Before this bug knocked me to my booty, I was able to complete a fun project for the studio. I made my own large magnetic board from scratch! Yup, I stumbled upon some nice trim hidden away in the garage, bought a big piece of sheet metal and plywood, and that was the beginning of a pretty nifty project! About finding that trim in the garage...it was completely serendipitous! I had been envying the same trim at Lowe's recently but it was too expensive and very much out my budget. But I had forgotten that I had bought a lot of the same trim a few years before when it was a little ...It was completely serendipitous!cheaper. Weird, huh? Imagine my surprise when I found enough of the trim to use for several projects!

I'll share with you the steps to making your own magnetic board at a later date, but here are a couple of photos of the board I made nearing completion. The magnets that I made for the board are actually 300 vintage scrabble tiles that I purchased from Ebay a while back. I super glued thin, rare earth magnets to the backs of them. It took a while, but they work perfectly!


I didn't want the sheet metal on my magnetic board to show, so we {my ZuZu and I} decoupaged vintage dictionary pages to the entire board. Here in this photo, we're just getting started laying out the pages. The first layer covered all the edges and the center, but for the second layer, I placed the pages haphazardly as if all the dictionary pages had just fallen from the air. Actually, there was a lot of strategy that went into the placement {let's face it, even in the dictionary, there are some words we'd just rather not look at everyday!}, but overall, it was a nice random pattern. You can see a bit of the painted and distressed trim in this photo. I think it looks great against the vintage dictionary pages! When I'm well and can be up and about without coughing until I gag, hehe, I will take photos of the finished project. I think it's one of my most favorite Twice Remembered projects thus far!


I hope you all have been well and stay well and I'm looking forward to continuing to share with you in 2010 all our cottage happenings here at Twice Remembered! Thank you so much for visiting! Until next time...

"May flowers always line your path and sunshine light your day.
May songbirds serenade you every step along the way.
May a rainbow run beside you in a sky that's always blue.
And may happiness fill your heart each day your whole life through!"


My front yard, 2007. We only dream of another snow this winter!

24 comments


More Cottage Studio Progress Photos


T hings are moving along in the studio and I'm really excited about some of the changes that have taken place in the last month. I will admit, I did not originally plan to dramatically change the studio as much as we have. Originally, I wanted to just paint the walls and make a couple of important pieces of furniture. I wanted to quickly get to what I've been been dreaming of doing for a very long time - crafting for a living.

However, when I was working on the studio floor a few weeks ago, I was looking around the space and I started thinking. {Hubs always holds his breath a little when I "start thinking"...} I started thinking about how this little studio space has so much potential. I started thinking about how I wasn't sure anymore about the robin's egg blue paint color on the walls {it didn't seem as I started thinking it's now or never. cheery with the arrival of fall and darker weather as it did in the spring and summer}. I started thinking about how much I love the color scheme in the kitchen {white, cream, red, and dark brown} and how I wished I could use the same palette in the studio. I started thinking about how I wanted to use more red in the studio because, well, I'm addicted to the color red. And finally, I started thinking about when I finally get busy crafting, I won't want - or won't be able to - take the time to tear apart the studio again at a later date to do all the things I wish I would have done to begin with. I started thinking it's now or never.

So I devised a new plan and moved forward. First, we changed the color of walls to the same color we've used in the rest of the house - Valspar's Malted Milk in an eggshell finish.


Then we attacked the door and windows with nice, wide farmhouse style trim. Though we still have the french sliders to trim out, I think the studio is looking more like a studio that belongs at Twice Remembered. Those little windows just sing now! {I've always said that a window without trim is like a face without eyebrows!}


I wanted to really beef up the door at the top of the steps. Actually, there was an unsightly boo-boo that I was looking to cover up somehow. The landing there will be a pretty special place when we are finished - lots of plans for that little area. The red mirror in the photo will not be in the room. It's just being stored in the studio at the moment.


I bought a sparkly baby chandelier to hang right here above the door...


Another major focal element that we've added is 8 foot tall beadboard on one of the walls. I would love to do the whole room, but our budget won't allow it, unfortunately. Even so, I think just one wall of beadboard goes a long way in adding cottage charm to a space. We added wooden brackets and will be installing a long shelf the whole way across the top of the beadboard.

I spray painted the brackets with an oil rubbed bronze spray paint {I got the idea after the brackets were already installed, thus the overspray.} I love the rich, dark brown of this shade - just what I was looking for!


We used wooden beadboard panels {4' X 8'}. It is somewhat rough to the touch to begin with but after a little sanding, it's a lot smoother.


The beadboard will be primed well and painted a nice, crisp white. The shelf that will go above it will be the same dark brown that the brackets are painted. And I have big plans for the wall space above the beadboard!


We've had this pine armoire for about 13 years and at one point was going to put it in a yard sale. It ended up in the garage and we instead used it for storage. I decided to dig it out for the studio, but it needed some major work first...namely, some additional trim {we still have a little to add} and a top so that I could sit things on it.


I think in the second photo from the top, you can better see the nice top hubs added to the armoire, but here is what the back now looks like. Impressive, huh? The back will go against the wall, of course, at the bottom of the steps.


And here is bit of a side view along with a view of the french sliders that need trim.


I have several small studio projects lined up and one includes creating a huge piece of art from this piece of plywood to sit on top of the armoire. The wall across from the beadboard wall needs something tall to balance it out visually and make the ceiling height seem proportionate.


Oh, and there will be more red!


I can finally say that we've put a little beadboard up in the kitchen. This is the door that leads into my studio. My heart is telling me to paint this door and all the main doors in the house red, but I don't know...{I know I've already asked for opinions on this in the past - I thought I decided I'd paint it/them white, but why am I hesitating? Why does white seem too safe for Twice Remembered?}


I hope you've enjoyed these progress photos as much as I enjoy sharing them with you. There is still so much to do but everyday puts me a little closer to being finished!

By the way, do you Twitter? If so, you can follow my progress as I tweet throughout the day about the projects I'm working on. If you're not into signing up for Twitter, you can still see my Twitter updates there to the right of my blog page.

Happy Wednesday, everyone!

P.S. I'm sorry about the poor photo quality of many of my pictures as of late. My photo editing software {what makes my pictures purdy} is on my studio computer, which has been unplugged and removed for a few weeks now. I'm using an online editor on a different computer which seems to distort the photos after I edit and save them.

29 comments


Older Posts Home
Subscribe to: Posts (Atom)


  • this and that

    • home
    • about
    • FAQ / have a question?
    • blogs of note
    • email

    categories

    • dining room
    • dollhouse
    • exterior
    • food
    • hallway
    • inspiration
    • kitchen
    • living room
    • personal
    • poetry and quotes
    • small projects
    • studio
    • thrifty finds

    search

    memory lane

    • ▼  2016 (2)
      • April 2016 (2)
    • ►  2013 (1)
      • January 2013 (1)
    • ►  2012 (4)
      • November 2012 (2)
      • July 2012 (2)
    • ►  2011 (30)
      • November 2011 (2)
      • October 2011 (2)
      • September 2011 (2)
      • July 2011 (3)
      • June 2011 (1)
      • May 2011 (7)
      • April 2011 (4)
      • February 2011 (2)
      • January 2011 (7)
    • ►  2010 (101)
      • October 2010 (2)
      • September 2010 (8)
      • August 2010 (2)
      • July 2010 (5)
      • June 2010 (6)
      • May 2010 (10)
      • April 2010 (10)
      • March 2010 (15)
      • February 2010 (23)
      • January 2010 (20)
    • ►  2009 (104)
      • December 2009 (7)
      • November 2009 (10)
      • October 2009 (11)
      • September 2009 (10)
      • August 2009 (24)
      • July 2009 (12)
      • May 2009 (16)
      • April 2009 (2)
      • March 2009 (8)
      • February 2009 (3)
      • January 2009 (1)
    • ►  2008 (55)
      • December 2008 (1)
      • November 2008 (8)
      • October 2008 (1)
      • September 2008 (7)
      • August 2008 (2)
      • July 2008 (6)
      • June 2008 (12)
      • May 2008 (11)
      • March 2008 (2)
      • February 2008 (1)
      • January 2008 (4)
    • ►  2007 (65)
      • November 2007 (3)
      • October 2007 (1)
      • September 2007 (4)
      • August 2007 (4)
      • July 2007 (1)
      • June 2007 (4)
      • May 2007 (9)
      • April 2007 (9)
      • March 2007 (11)
      • February 2007 (6)
      • January 2007 (13)
    • ►  2006 (107)
      • December 2006 (12)
      • November 2006 (4)
      • October 2006 (3)
      • September 2006 (4)
      • August 2006 (3)
      • July 2006 (16)
      • June 2006 (16)
      • May 2006 (17)
      • April 2006 (9)
      • March 2006 (7)
      • February 2006 (13)
      • January 2006 (3)
    • ►  2005 (23)
      • December 2005 (6)
      • November 2005 (3)
      • September 2005 (6)
      • August 2005 (1)
      • July 2005 (3)
      • April 2005 (3)
      • March 2005 (1)
    • ►  2004 (4)
      • December 2004 (1)
      • November 2004 (1)
      • October 2004 (1)
      • August 2004 (1)

    as featured in...

    as featured in...

    inspiration

    • Miss Mustard Seed
    • The Graphics Fairy
    • The Gardener's Cottage
    • MARLEY and LOCKYER
    • Notes from A Cottage Industry
    • Air Kiss
    • home and harmony
    • FleaMarketTrixie
    • White Living
    • me and Alice
    • Dreamy Whites
    • Jennys Hem och Harmoni
    • Burlap Luxe
    • French Larkspur
    • The Painted Hive
    • BELLE BLANC
    • Et à part ça ?
    • Fiona and Twig
    • A Country Farmhouse
    • Vita Verandan
    • Agnes Shabby Chic
    • Vita Ranunkler
    • Linden Townhouse
    • Cottage Dreamers
    • an angel at my table
    • Welcome to Boxwood Cottage!
    • LA MAISON DOUCE
    • Modern Country
    • {oc cottage}
    • BELDECOR
    • Millas hem
    • 52 FLEA
    • Meadowbrook Farm
    • Lilla Blanka
    • K&K Test Kitchen
    • Hvítur Lakkrís
    • Brabourne Farm
    • Maple & Magnolia
    • The Old Painted Cottage - The Blog
    • white flower farmhouse
    • {Beautiful Nest}
    • The Fairfield House
    • Ticking and Toile
    • miss gracie's house
    • Crème de la Crème
    • Whimsy by Victoria
    • Faded Prairie
    • between cottage and cabin
    • Spets och snor
    • Faded Plains
    • frugal farmhouse design
    • Barn House
    • Anettes Hus
    • Songbird
    • Un autre été
    Show 25 Show All
  • extra! extra!

    extra! extra!


    my little shop

    kitchen

    kitchen

    studio progress

    studio progress

    small projects

    small projects

    thrifty finds

    thrifty finds

    food

    food

    dollhouse blog

    dollhouse blog

    subscribe

    Posts
    Atom
    Posts
    All Comments
    Atom
    All Comments

    email updates

    Enter your email address:

stay in touch

popular posts

  • Make Your Own Magnet Board
    "Live in the sunshine, swim the sea, drink the wild air" ~ Ralph Waldo Emerson I appreciate everyone's well wishes in my last...
  • Transformation of a Cottage Kitchen Part 2: Antique / Farmhouse Style Red Cabinet Makeover
    K itchen cabinetry. Really, your kitchen cabinetry can be considered one of the major furniture pieces of your home and, to say the least, Y...
  • Make Your Own Vintage Art ... With Nail Polish Remover!
    I know I left you all hanging on Wednesday when I said that I was working on transforming the framed art below with my {not so secret} secr...
  • Everything and the Kitchen Sink: Farmhouse Sink Inspiration Photos
    F armhouse sinks. I don't think I've ever seen one that I didn't love. Usually what first comes to mind when we think of these o...
  • Red Cottage Kitchen Vignettes and Hardwood Photos
    Y ou all left such lovely comments in my last entry about our new hardwood flooring. Thank you! It was a backbreaking job as you may well k...
  • Perfect White Chocolate Chip Cookie Recipe
    I 've been thinking about all of you who are having to endure these huge snowstorms in various parts of the country. How are you faring?...
  • Decoupage Goodness
    D ecoupage. I love it! After my last project that involved decoupaging, I believe I've convinced myself that I want to use old book pag...
  • Photos: Red Cottage / Farmhouse "Antique" Kitchen Cabinets *FINALLY* Complete!
    Get Your Own! | View Slideshow I didn't think I'd ever see the day where I could officially say..."The cabinets are fini...
  • A New Journey
    D ear friends... I want you to know that I have not forgotten about you.  I miss you AND blogging so much! Some of you, I've known ...
  • Instagram, Anyone?
    I want to thank you all for your words of support and encouragement in my last post, A New Journey .   It means so much to hear from y...


 cottage guests now visiting

The Twice Remembered Cottage © 2008 Free Premium Wordpress Themes and BlackQuanta | Bloggerized by : GosuBlogger