Spring Lovin', Spring Dreamin'


Ahhhh, finally, finally spring is here! Are you enjoying a nice warm up in your area? I believe we are suppose to hit near 80 degrees by week's end in our neck of the woods. Glorious!

I was at one of my second homes the other day {Lowe's Home Improvement, the other being Home Depot} when I called hubs to see if he needed anything. I don't know why, but I was shocked to hear my daughter tell me "Daddy's out mowing the grass." Shocked because it finally hit me - Winter is over! This means more work for us, of course, keeping the grass cut and weeds at bay, but at the moment, I'm looking forward to it. It's been a couple of years

I tried to rid myself of my black thumb of death by getting out there and planting a few things...
since we've really done anything with our landscaping and boy, you can tell right now that it needs some major sprucing up! I wouldn't dare show you how dreadful our flower beds and exterior look right now, but a couple of years ago, I tried to rid myself of my black thumb of death by getting out there and planting a few things. There are so many areas around our house that are begging for plants...just so much potential...but I've been reluctant to do much because our time is very limited and any "extra" time has gone to working on interior projects. But someday, I'm going to cut loose and will somehow develop the green thumb I've always wanted! Someday I will have a kitchen garden as well, and I'm thinking about at least starting an herb patch this year. We'll see!

Here are a few shots of our front porch a couple of years back. I used an old dresser as a staging area for some plants. Now the dresser is actually being used as a dresser, so I need to keep my eye out for another...


Last year we installed a new front door that I think better reflects cottage style. I'm waiting to paint it until we get around to painting the exterior of the house. There is a lot of siding replacement and repair to do first, though. Tumble-down indeed!


I had forgotten that we even had a shot of the front of our house. Sometimes people write and ask if I would share an exterior photo so I thought I'd post this. Many may be surprised to see that we live in a normal looking little house that right off the bat doesn't seem like a "cottage". I'm trying to think of ways to add some architectural detail to reflect more of a cottage feel. A porch railing? Board and batten siding? Wooden shutters? Window boxes? A cottage style garden in the landscaping bed? Climbing roses? Tin/Metal roof? Painting the house red?


I thought this house was way too small for a family of five when we first drove past it, but it is a little bigger than it looks. Here is a view from the back. The interior, though, isn't as spacious as it may appear from this view. :)


I feel like I'm being a flaky blogger, but this week is going to be another crazy one. Every day for the rest of the week we have something going on that will keep me from blogging, the main event being a big turkey dinner I'm making for out of town and state family coming in on Saturday. So there is a lot of shopping, cleaning, and preparation {including finishing trim for our new beadboard!} to be done...not to mention excavating our daughters' beds where some guest will need to sleep. I told you their room wouldn't stay tidy for long! Photos from my trip and our fireplace and beadboard progress photos will have to wait a little longer...I was going to post a few today but I think hubs has the little memory card reader thing-a-ma-bob with him, or somewhere!

Have a wonderful, BEAUTIFUL week, everyone, and if you have some exterior ideas for me, please do share!

20 comments


Make Your Monday Week 18 - Add Your Project Link!


{I'm posting this a little early tonight, but you can add your link at the normal time - 9 pm Central. The cable guys are here now...(this late!) running a new cable line as we've been having issues. They'll be temporarily turning off the cable in a few minutes but I'm not sure for how long. So just in case, I'm posting this now!}

Hubs and I had a wonderful getaway traveling through Kentucky, Missouri, and Illinois - but we're glad to be back home! Unfortunately, I started getting sick on our way back but I think I'm on the mend now. I'm looking forward to telling you all about our adventures soon, and showing you a few goodies I picked up as well!

It's time for another Make Your Monday link event! Show us where your creativity has taken you lately by joining in! {see instructions - please use the proper "link back" coding for the Make Your Monday button below}

Enjoy these highlights from Week 17 and then be sure to post your project links below!

Terrarium @ Signs of Obsession


Canvas Dropcloth Roman Shades @ Jenny Free style


Teapot Wind Chime @ Once Upon a Dandelion


Rake Wine Glass Holder @ Prior Lives


Letter Blocks @ Stories By Me


Now let's have another creative Make Your Monday link event! To participate, just follow these 2 easy steps:

1) ~First, create a blog entry about something you made yourself. **Include in your blog entry a link back to this post so that others can discover this great list of Make Your Monday links and have an opportunity to contribute. To get this link, just click on the post title above and then copy the address that appears at the top of your browser.

2) ~Next, add your Blog name down below along with a short description of your project and then add the permalink of the blog entry about your project {not your blog homepage}. Where's the permalink? Just click on the title of your Make Your Monday entry and then copy the address that appears in the address bar and paste it down below. It should look something like this:
http://yourblogname.blogspot.com/2009/07/your_project.html.


Don't worry if you come back and your blog isn't listed anymore. You can just make the needed adjustments and add your link again. You can grab the Make Your Monday button for your site, too, if you like.


That's it! We're looking forward to seeing what you've been up to! Have fun visiting all the creative projects below!

{This list will open on March 28 at 9pm Central time and will close on March 30, 12am central time}

17 comments


Road Trip! and Naomi Lynn: For the Love of Paper


It's spring break and we are actually taking a break of our own from all things remodeling related by going on a road trip! Where are we headed? To Laura Ingalls Wilder's homestead on Rocky Ridge Farm in Mansfield, Missouri. I'm a huge Laura fan, so hubs really surprised and pleased me when he told me what he had in mind. We also will be going to the Memphis Zoo, doing some hiking, and who knows what else.:) We have one more work day to get in here at Twice Remembered first - which includes more trim work and hopefully more beadboard for our hallway...oh, and packing for the trip! Because we'll be away, I won't be hosting Make Your Monday this upcoming week but will pick it up again the week after.

While we take this little break, please take a moment to visit my talented sponsors, including Naomi Lynn...For the Love of Paper. Naomi specializes in beautiful personalized stationery and offers a diverse array of styles and colors.

Below are few of my favorite items at Naomi Lynn's right now - but she loves new projects, so if you have something else in mind, just let her know!


I love these vintage style calling cards...


...and how classic are these "Let's Get Together" note cards?


Or these personalized cards in beautiful script?


You know I love the old fashioned images Naomi uses, like this quill pin and inkwell...


and this bicycle....


or how about this old typewriter?


With most of the paper goods Naomi Lynn has to offer, you can choose from 25 eye catching colors.


To see even more of Naomi's creations, please visit Naomi Lynn...For the Love of Paper and enjoy working with her to come up with just the right personalized stationery or calling card for you!

We'll see you in a few days! Enjoy your last day of winter today {Saturday} and first day of spring tomorrow!

17 comments


Make Your Own Charming Old-Fashioned Postcards


Deborah of The Fairfield House recently hosted a postcard exchange and it really got me thinking about those wonderful old postcards of long ago. I have not yet sent my postcards out because I really wanted to try to do something a little different - something with a touch of old-time charm.

For this project, I decided that I would make my own postcards. The particular postcard project I'm sharing with you today will actually require mailing the postcard in an envelope, but you can modify your card to meet postal regulations and send it without an envelope. Why an envelope for this project? Well, for one thing, you'll be using actual photographs that could easily get damaged in transit.

I quickly see this becoming another hobby!
Second, this project involves adding photo corners to the back of the card to adorn the photo. The USPS doesn't like sticky attachments to postcards because they could come off in their machinery while being processed. Also, the photo corners may add to the maximum thickness allowed for postcards. Lastly, the USPS doesn't like graphics added right under the mailing address on postcards because this is the area that is scanned and barcoded. {Hmm, I just thought of another reason to use an envelope...who wants that ugly barcode across the bottom of their custom made postcard?}

The idea is to recreate a lovely, old-fashioned photo gift for your recipient.
The idea is to recreate a lovely, old-fashioned photo gift for your recipient, so basically, the postcard aspect is just a little something to add to the appeal, but as I mentioned, I'll give you some options below if you would like to send the postcard without the envelope.

For this project, you'll need copies of some old photographs {you don't want to send the original, of course!}. The Library of Congress has many old public domain photos available.


The hardest part will be deciding which photos to use for your postcards!


You will need some cardstock paper on which to print the postcard. It needs to about the thickness of an index card.


I chose some paper with a nice texture.


You'll also need some pretty photo corners {these were from the Martha Stewart line},


a reprint of an old photo,


some double sided photo tape,


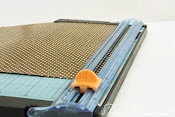
and a paper cutter {or scissors if you have a steady hand!}.


If you will not be putting your postcard in an envelope, you'll need to protect your photo by covering it first with with laminate before attaching it to your cardstock. I won't get into that step here, but it's pretty simple to do. Remember, you will not be using the photo corners if you are mailing as an actual postcard without an envelope.


I created a few postcard documents for you to download using some beautiful graphics I found at The Graphics Fairy here and here. I can't get enough of The Graphics Fairy, by the way!


Click and download the image below to create a postcard that you will be mailing in an envelope. Be sure to print it on your chosen cardstock. {If you just need to mail it without an envelope, I'm not sure how the USPS will feel about the graphic in their "postcard scan/barcode zone"...they'll either send it back to you or they may just require extra postage to send it as regular mail. I don't know...maybe they won't do anything at all but mail it as a poscard! But I do know you'll need more than 1 cent to mail it!}


If you will be mailing the postcard without an envelope, click and download either of the documents below.


After printing your postcards, trim them down to size. For some of mine, I cut right at the red line. For others, I left a small border. It took some practice and I messed up a times, but finally, I got the hang of creating borders.


All of my old photos were 4 X 6 {about the size of the postcard itself}, so I trimmed down my selected photos just a bit to also create a border of sorts around the photo. After trimming your photo, put your photo corners in place...


...and then flip your photo over. Raise the back of the photo corners up a bit and place a piece of photo tape under them.


Then remove the paper backing from the tape and press down the photo corners.


I probably really overdid the next step, but place pieces of photo tape around the perimeter of the back of the photo and remove the tape backing.


Now take your photo and carefully center and place it on the unprinted side of your postcard.


You can also use those photo corners to embellish the corners of the postcard itself. Pretty!


Now all that's left to be done is to fill out your sweet, old-fashioned postcard! Though I'll be inserting my cards in envelopes, I'll still include a mailing address...just because!


When my "work" computer with my editing software is all set up again, I'd love to create some more postcard styles based on inspiration found from actual old postcards. And how fitting would an old beautiful stamp, or a print of an old stamp, be in the corner of envelope mailed postcards? I quickly see this becoming another hobby!

19 comments


Newer Posts Older Posts Home
Subscribe to: Posts (Atom)


  • this and that

    • home
    • about
    • FAQ / have a question?
    • blogs of note
    • email

    categories

    • dining room
    • dollhouse
    • exterior
    • food
    • hallway
    • inspiration
    • kitchen
    • living room
    • personal
    • poetry and quotes
    • small projects
    • studio
    • thrifty finds

    search

    memory lane

    • ►  2016 (2)
      • April 2016 (2)
    • ►  2013 (1)
      • January 2013 (1)
    • ►  2012 (4)
      • November 2012 (2)
      • July 2012 (2)
    • ►  2011 (30)
      • November 2011 (2)
      • October 2011 (2)
      • September 2011 (2)
      • July 2011 (3)
      • June 2011 (1)
      • May 2011 (7)
      • April 2011 (4)
      • February 2011 (2)
      • January 2011 (7)
    • ▼  2010 (101)
      • October 2010 (2)
      • September 2010 (8)
      • August 2010 (2)
      • July 2010 (5)
      • June 2010 (6)
      • May 2010 (10)
      • April 2010 (10)
      • March 2010 (15)
      • February 2010 (23)
      • January 2010 (20)
    • ►  2009 (104)
      • December 2009 (7)
      • November 2009 (10)
      • October 2009 (11)
      • September 2009 (10)
      • August 2009 (24)
      • July 2009 (12)
      • May 2009 (16)
      • April 2009 (2)
      • March 2009 (8)
      • February 2009 (3)
      • January 2009 (1)
    • ►  2008 (55)
      • December 2008 (1)
      • November 2008 (8)
      • October 2008 (1)
      • September 2008 (7)
      • August 2008 (2)
      • July 2008 (6)
      • June 2008 (12)
      • May 2008 (11)
      • March 2008 (2)
      • February 2008 (1)
      • January 2008 (4)
    • ►  2007 (65)
      • November 2007 (3)
      • October 2007 (1)
      • September 2007 (4)
      • August 2007 (4)
      • July 2007 (1)
      • June 2007 (4)
      • May 2007 (9)
      • April 2007 (9)
      • March 2007 (11)
      • February 2007 (6)
      • January 2007 (13)
    • ►  2006 (107)
      • December 2006 (12)
      • November 2006 (4)
      • October 2006 (3)
      • September 2006 (4)
      • August 2006 (3)
      • July 2006 (16)
      • June 2006 (16)
      • May 2006 (17)
      • April 2006 (9)
      • March 2006 (7)
      • February 2006 (13)
      • January 2006 (3)
    • ►  2005 (23)
      • December 2005 (6)
      • November 2005 (3)
      • September 2005 (6)
      • August 2005 (1)
      • July 2005 (3)
      • April 2005 (3)
      • March 2005 (1)
    • ►  2004 (4)
      • December 2004 (1)
      • November 2004 (1)
      • October 2004 (1)
      • August 2004 (1)

    as featured in...

    as featured in...

    inspiration

    • The Graphics Fairy
    • Miss Mustard Seed
    • The Gardener's Cottage
    • MARLEY and LOCKYER
    • Notes from A Cottage Industry
    • Air Kiss
    • home and harmony
    • FleaMarketTrixie
    • White Living
    • me and Alice
    • Dreamy Whites
    • Jennys Hem och Harmoni
    • Burlap Luxe
    • French Larkspur
    • The Painted Hive
    • BELLE BLANC
    • Et à part ça ?
    • Fiona and Twig
    • A Country Farmhouse
    • Vita Verandan
    • Agnes Shabby Chic
    • Vita Ranunkler
    • Linden Townhouse
    • Cottage Dreamers
    • an angel at my table
    • Welcome to Boxwood Cottage!
    • LA MAISON DOUCE
    • Modern Country
    • {oc cottage}
    • BELDECOR
    • Millas hem
    • 52 FLEA
    • Meadowbrook Farm
    • Lilla Blanka
    • K&K Test Kitchen
    • Hvítur Lakkrís
    • Brabourne Farm
    • Maple & Magnolia
    • The Old Painted Cottage - The Blog
    • white flower farmhouse
    • {Beautiful Nest}
    • The Fairfield House
    • Ticking and Toile
    • miss gracie's house
    • Crème de la Crème
    • Whimsy by Victoria
    • Faded Prairie
    • between cottage and cabin
    • Spets och snor
    • Faded Plains
    • frugal farmhouse design
    • Barn House
    • Anettes Hus
    • Songbird
    • Un autre été
    Show 25 Show All
  • extra! extra!

    extra! extra!


    my little shop

    kitchen

    kitchen

    studio progress

    studio progress

    small projects

    small projects

    thrifty finds

    thrifty finds

    food

    food

    dollhouse blog

    dollhouse blog

    subscribe

    Posts
    Atom
    Posts
    All Comments
    Atom
    All Comments

    email updates

    Enter your email address:

stay in touch

popular posts

  • Make Your Own Magnet Board
    "Live in the sunshine, swim the sea, drink the wild air" ~ Ralph Waldo Emerson I appreciate everyone's well wishes in my last...
  • Transformation of a Cottage Kitchen Part 2: Antique / Farmhouse Style Red Cabinet Makeover
    K itchen cabinetry. Really, your kitchen cabinetry can be considered one of the major furniture pieces of your home and, to say the least, Y...
  • Make Your Own Vintage Art ... With Nail Polish Remover!
    I know I left you all hanging on Wednesday when I said that I was working on transforming the framed art below with my {not so secret} secr...
  • Everything and the Kitchen Sink: Farmhouse Sink Inspiration Photos
    F armhouse sinks. I don't think I've ever seen one that I didn't love. Usually what first comes to mind when we think of these o...
  • Red Cottage Kitchen Vignettes and Hardwood Photos
    Y ou all left such lovely comments in my last entry about our new hardwood flooring. Thank you! It was a backbreaking job as you may well k...
  • Perfect White Chocolate Chip Cookie Recipe
    I 've been thinking about all of you who are having to endure these huge snowstorms in various parts of the country. How are you faring?...
  • Decoupage Goodness
    D ecoupage. I love it! After my last project that involved decoupaging, I believe I've convinced myself that I want to use old book pag...
  • Photos: Red Cottage / Farmhouse "Antique" Kitchen Cabinets *FINALLY* Complete!
    Get Your Own! | View Slideshow I didn't think I'd ever see the day where I could officially say..."The cabinets are fini...
  • Instagram, Anyone?
    I want to thank you all for your words of support and encouragement in my last post, A New Journey .   It means so much to hear from y...
  • A Cottage Bedroom - The Marmalade Makeover
    H ello friends, and Hello 2013 !  I hope this brand new year finds you and your family happy and well.  We've been chipping away at...


 cottage guests now visiting

The Twice Remembered Cottage © 2008 Free Premium Wordpress Themes and BlackQuanta | Bloggerized by : GosuBlogger